Showing posts with label Science Activities. Show all posts

Monday, February 27, 2017

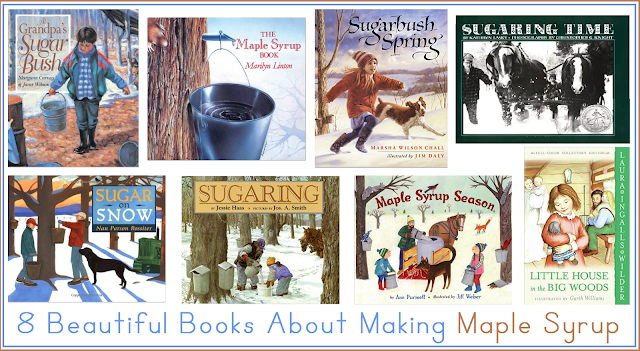
8 Beautiful Books About Making Maple Syrup

This post contains affiliate links.
8 Books About Making Maple SyrupPin It
It's tree tapping time!  I never cease to be amazed when I see sap dripping out of a tree, knowing that it possesses life giving nutrients and can be enjoyed as a tasty treat.  Our culture prides itself in complex technical invention, but my heart turns to praise God for the genius, yet simple, ways he provides for his creation.

Whether you are tapping your own trees, or just want to expose your children to the beauty of turning sap into delicious syrup, these are the books for you!  (I know I said 8 books, but I couldn't resist and threw in a 9th!)

Sugarbush Spring by Martha Wilson Chall


Sugaring by Jessie Haas


Grandpa's Sugar Bush by Margaret Carney


The Maple Syrup Book by Marilyn Linton


Maple Syrup Seasons by Ann Purmell


Sugar on Snow by Nan Parson Rossiter


Sugaring Time by Kathryn Lasky


If you are looking for a chapter book to read aloud or for an older child, don't miss:


Miracles on Maple Hill by Virginia Sorensen


Little House in the Big Woods by Laura Ingalls Wilder


If you would like to learn more about how to tap your own maple trees, I show step-by-step how in my posts: 


Maple Sugaring at Home


 photo SubscribeButton_zpsdc17ac56.png


Monday, May 2, 2016

Encouraging Curiosity with By Design Science


I received this curriculum for free in order to provide you with my review of it.  I was compensated for my time.  All opinions are my own.
By Design Science Textbook Review
Pin It
Classical education is what I love.  I used to think that in order to teach classically, I needed to use certain, classical curriculum.  While curriculum that has been designed to facilitate a classical education can be helpful, I have been learning that it isn't so much what curriculum you use, but how you use it.

When I first was given the opportunity to review By Design Science, I wasn't sure how I would like it since it isn't written specifically for classical homeschoolers.  In fact, it is the most textbook type book I have ever used with my children (other than for math).

I thought I should give it an honest look before making my decision, so I browsed the sample pages. What I found was engaging, Christian, curiosity inducing content.


By Design 2nd Grade Textbook


Each school morning since we received this curriculum my children and I have sat down together and learned about life science.  We have included this as a part of our spring trimester morning time and it fits perfectly!  I chose the 2nd grade text and started with the first unit, which is life science.  Each grade level (1st - 8th) of By Design Science is broken down into four units: life science, human body, earth and space science, and physical science.


By Design Student Journals
Student Journals For Each Unit

I am notorious for expecting my children to do more than is reasonable for their ages.  This curriculum was great for me because it gave me developmentally appropriate material to enjoy with them, and guess what?  They are loving it!

Even though By Design is a textbook, I found it to be delightfully conversational!  Basically, I would sit across from my children at the kitchen table, I would look at my teachers guide and they would look at the student text, and we would discover new things together.

First I would just have them look at the pictures on the page and try to notice all that they could about them.  Just this exercise of observing led to so many great conversations!  Then we would read through the few paragraphs out loud.  The paragraphs would share a bit of new information, but also would ask questions.  I love how this would get my children thinking and discussing, digging deep into the subject matter.  It really is an inquiry approach to science.

This curriculum (at this grade level) is not filled with facts to memorize and words that are difficult to pronounce, but instead guides children toward wonder and curiosity at the world that God has created.   


Engaging Your Children with By Design Science


By Design Teacher Manual

After we are done with our initial conversation about the material, I look around the boarder of my teacher's edition for other ideas of ways to engage my children with the material.  There are always great ideas to further their inquiry and knowledge.  There are more ideas to discuss, background knowledge to acquire, and experiments to discover.  Sometimes I mistakenly think "Come on kids, lets move on to the next thing now." But then I realize how silly that thought is, because this kind of engagement is exactly what I want!

During one of the lessons we were talking about what kinds of things animals need to survive. A suggested activity had to do with doing an experiment about the shape of bird's nests. This was perfect for us because we have been reading, watching, and nature journaling about birds this spring!  Here is my daughter having a fun time figuring out what shaped nest would best keep eggs from rolling out:

By Design Nest Shape Experiment

By Design Nest Shape Experiment

By Design Nest Shape Experiemnt

She made a hypothesis, worked hard testing the nest shapes, and excitedly came to a conclusion!  My son is the 2nd grader (the age this level is designed for), so I had him fill out the student journal page.  He recorded our hypothesis, our observations, and our conclusion.

By Design Student Journal


A Christian Science Curriculum


I believe that if we want to learn truth, it is impossible to leave God out of the story.  Some say that we need to do this for a subject like science, but I believe that we need to give glory to God especially in a subject like science.  How could we ever attempt to learn about ourselves and our world without first turning to the One who created us and this world.

By Design Science is a faith-based curriculum that acknowledges and gives glory to God throughout the book.  The text reminds us that God is the creator of all the things we are learning about and that he designed everything for a purpose!  Often in the book it asks us to look up a passage in the Bible or reminds us of a passage within the book.

I want to let you know that By Design Science is created by a Seventh Day Adventist group.  I am not Seventh Day Adventist, so I was on the look out for anything that would go against what my family believes.  The teachers guide does have quite a bit of info at the beginning about how this curriculum will reinforce the Adventist beliefs, but the student textbook does not include this information (which I was thankful for).  The student text is filled with references to God and the Bible, but I did not find anything at all that was contrary to my beliefs, in fact, I thought that the way it incorporated those topics was perfect!


Get sample pages from By Design grades 1 through 8


If you are looking for a science curriculum for next year, or want to lead your children into a curiosity driven exploration of the world this summer, I highly recommend that you check out By Design Science!  Don't forget that you can view sample pages from each grade level to help you learn even more!


Want to learn more about the publisher?  Visit Kendall Hunt Publishing Company and Kendall Hunt Religious Publishing.  


 photo SubscribeButton_zpsdc17ac56.png


Thursday, March 31, 2016

Maple Sugaring at Home: Making Maple Syrup

This post is sponsored by Tap My Trees, who provided me with me with maple sugaring materials and compensated me for my time in reviewing them.
Maple Sugaring at Home: Making Maple Syrup
Pin It
This year we had the privilege of trying something we have never done before.  Thanks to Tap My Trees, we got to try our hand at making maple syrup...from our own maple trees!  It is something that I've always wanted to do, but had no idea where to start.  If you are like me, just visit www.tapmytrees.com and you will be all set!

We started this whole process last year by figuring out what kinds of maple trees we have and making sure that we had all of our supplies.  I wrote all about it in the post Maple Sugaring at Home: Getting Ready to Tap My Tree.

So once Christmas was over and the new year came, I remembered that Little House in the Big Woods told me that it was almost tree tapping time!  Now that I am an adult, I feel like time flies so quickly (is it that way for you too?) so I was a little afraid that I would miss it all together, but I just kept remembering what I learned from my Maple Sugaring at Home booklet: daytime temperatures above freezing, nighttime temperatures below freezing.

Step One: Drill a Hole in Your Tree and Hang Your Bucket


drilling hole in maple tree

So once we got a warm spell, the whole family went out to one of our maple trees to hang our sap collecting bucket.  Maple sugaring time is typically about a 6 week season in late February-March.  Our warm spell came in the beginning of February, and since I was afraid of missing the whole season, we went ahead and drilled our hole.

Drilling hole for maple suggaring

Sap was supposed to start dripping out, but nothing happened.  Then I started worrying that we were too early and that I messed the whole thing up.  Luckily, I searched for some information online and found that it is ok to drill your hole early.  Sap will just start dripping when it is time!

Let me tell you, this whole experience was a great lesson in patience!  I am not a very good DIYer, so while this process was fascinating to me, I was very nervous that somehow I would mess it all up.  SPOILER: everything turned out ok.

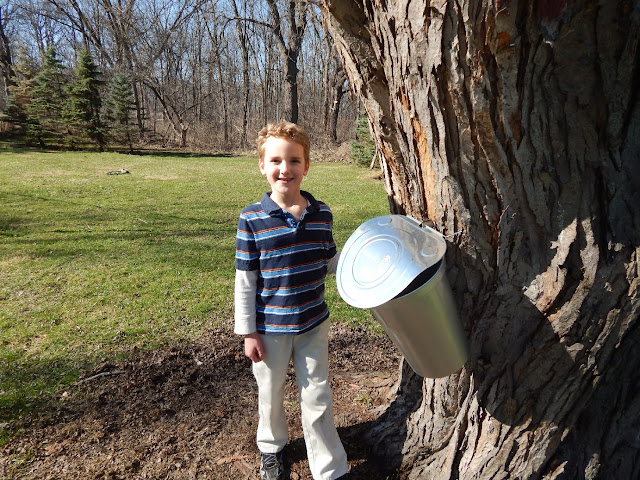
Hanging sap collection bucket


Step Two: Wait for the Sap to Flow


This was the hardest part, for sure!  I think the weather in my area this year was just wrong.  We would get a warm spell, but the night time wouldn't get below freezing.  Then it would cool back off, but the daytime wouldn't get above freezing.  That cycle repeated a few times, and then finally we got a week where the temperature were above freezing in the daytime and below freezing in the night time.
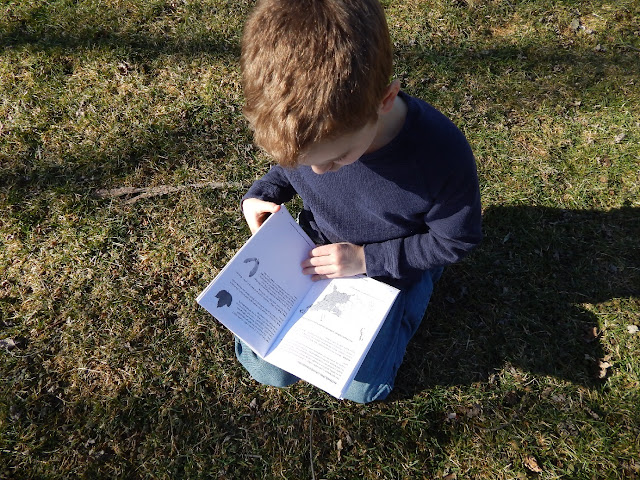
Tap My Trees booklet
Waiting and reading to make sure that we did it right!

We would faithfully check and recheck the bucket to see if any sap had come out.  We would stick our fingers up the spile to see if we felt anything trying to come out.  Nothing.  I even tried drilling a hole into another tree because I thought that maybe my one tree was a dud! Nothing.

Then one magnificent day I decided to go back in our yard to look at the hole in the original tree and much to my delight I saw some sap!  So, I ran up to the tree in the front yard (that I had switched the bucket to), grabbed it, and ran back to hang it on the backyard tree.

I felt like a little kid, watching with wonder and delight. Beautiful, clear sap was dripping out.  This mysterious liquid from inside the tree was able to be eaten.  Amazing.

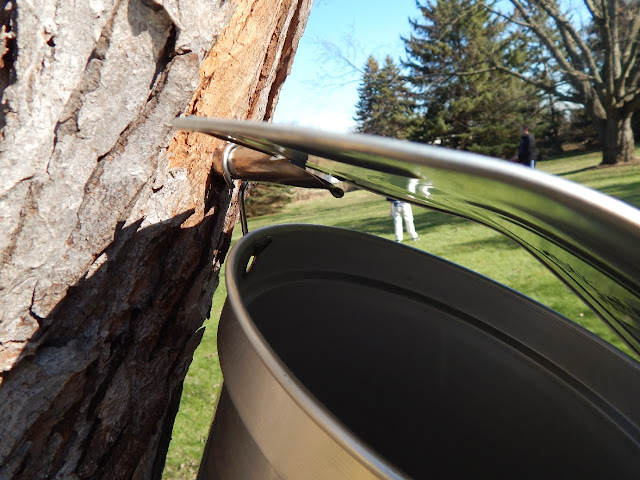
If you look super closely at the picture below you can see a drip about to fall off of the spile.  If you want to see a much better video of what it looks like when sap drips out, check out this video at Tap My Trees.


Dripping Sap

Step Three: Collect Your Sap


When you get a full bucket, or when sugaring season is over, you will need to collect your sap. Unfortunately we did not get a ton of sap, but that didn't stop us from wanting to finish the process of making maple syrup!

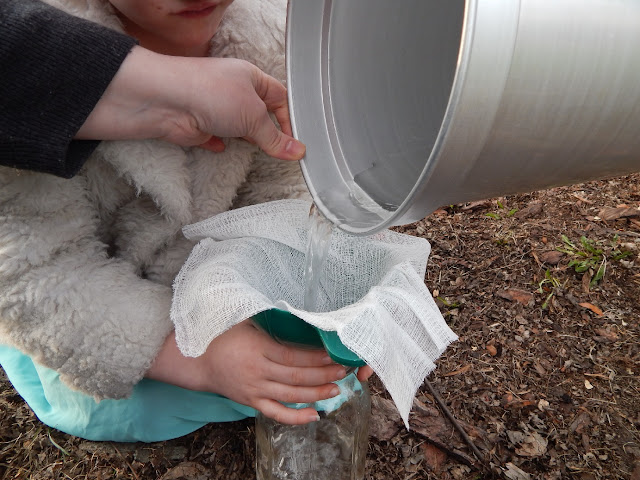
You will want to gather a sanitized container and a piece of cheesecloth (which Tap My Trees provides if you get the starter kit like I have), and head out to your tree.  You might want to bring a trusty helper like I did, so your jar doesn't tip over and spill your precious sap.  Unless of course you get more sap than we did, and then you won't be using such a little jar!

Filtering sap

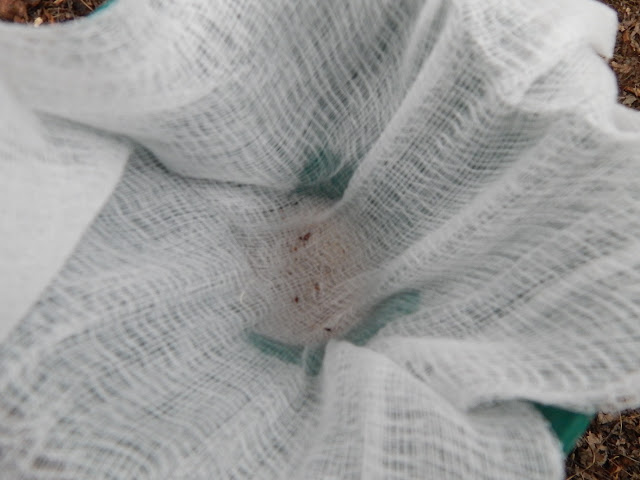
See how the cheesecloth catches any little sticks or pieces of leaves that might have gotten into the collection bucket?

Contaminants from sap

So proud of our quart of sap!


Beautiful, clear sap


Step Four: Boil Your Sap to Make Syrup


Now that you have your beautiful, clear sap, it is time to boil it!  If you have a lot of sap, it is recommended that you boil it outside.  Since we only had a tiny bit of sap, we just did it inside.

If you have a lot of sap, the boiling process can take a really long time.  Since we only had a tiny bit of sap, we were done in an hour!

Pour your sap into a pot that is much higher than the amount of sap you have.  As the sap boils, it boils up quite a bit and you don't want it to spill.  Heat the sap until it boils, keeping an eye on it so that it doesn't boil over or get too hot.  It will boil down fairly quickly as the water evaporates out of it, leaving just the sugary syrup.  I was amazed at how quickly the sap level in the pan went down.

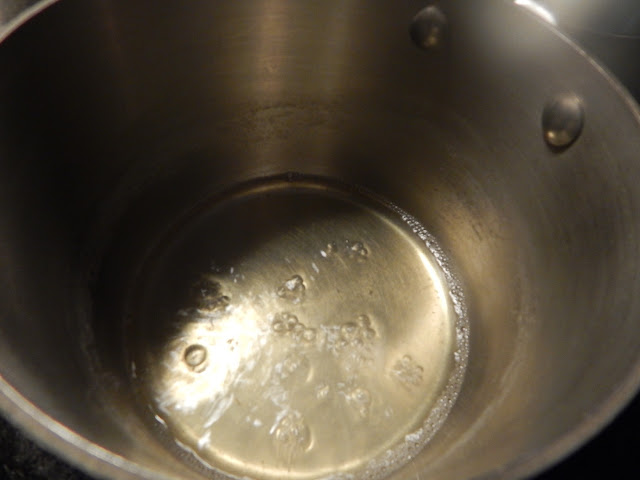
Sap boiling down

Can you tell how much the sap level went down?  If you look closely at the picture above, you can see a light ring where the sap level started.  At this point we were probably down to a half of a cup of liquid.  Once the sap as boiled down significantly, you want to make sure to keep a close eye on it because the next step happens quickly!

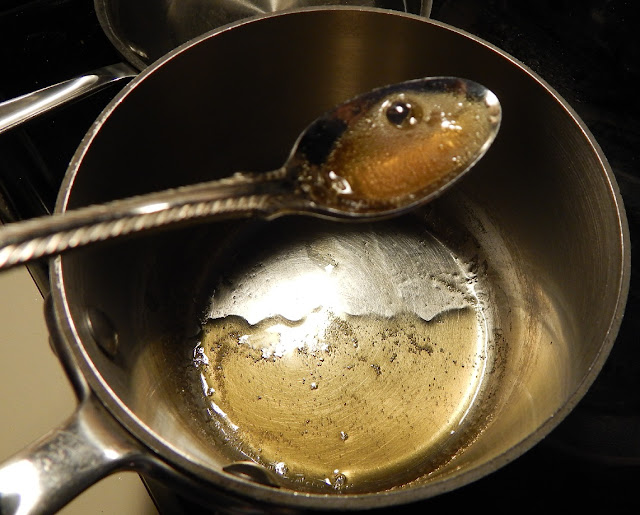
Syrup almost completed

Do you see how the liquid has turned a caramel color and how the bubbles are completely covering the top?  This pretty much means that you are done!  Officially, you want to see that your syrup has reached 7°F above boiling point (which can vary a bit depending on where you live).  My kit came with a nice candy thermometer, which I tried to use, but with my tablespoon of syrup it just didn't work!  Hopefully if you try this you will get a whole pot full of syrup and then the thermometer will work great.

Instead, I stirred my syrup with a spoon and noticed to see that it coated the spoon instead of just running off like water.  I was nervous that I would heat it too long or not long enough, but thankfully it was pretty obvious to tell when it was ready.

Finished syrup

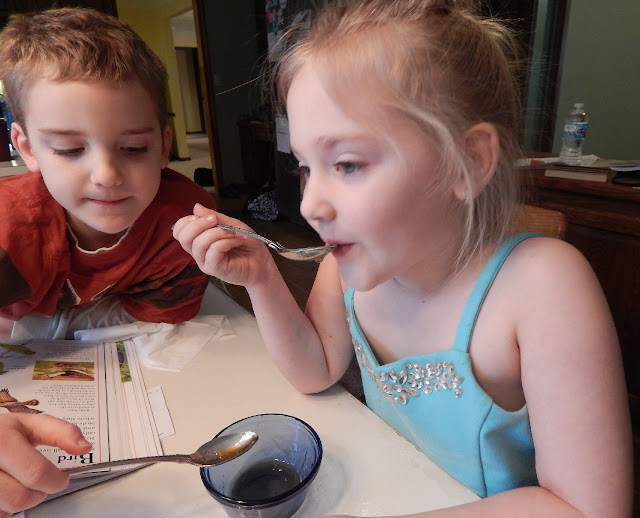
Look at that beautiful syrup!  At this point, you would filter it once more (through a filter that comes with the starter kit), but we had such a little amount that I didn't do that step. Instead we just ate it off of the spoon and then it was gone!  It tasted wonderful!

Enjoying maple syrup


What I love is that I still have everything that I need to do this again next year.  This was a fantastic learning experience and now I can try again next year, but this time with confidence!

No step in the process was difficult.  The hardest part was patiently waiting for the sap to come out of the tree. The most exciting part for me was watching the sap drip out of the tree. I think I stood for about an hour and just watched it =)  Who knows, next year I might even get a few more buckets and try tapping a couple of trees, or putting another tap into the tree I used this year (the diameter of the tree is big  enough to support a few buckets).


Have you made maple syrup before?  Would you like to try?


Learn more by connecting with Tap My Trees on:

Facebook --- Pinterest --- Twitter --- Instagram


Did you miss part 1?  Learn how to identify your maple trees and prepare to make your own syrup!

Maple Sugaring at Home: Getting Ready to Tap My Tree


 photo SubscribeButton_zpsdc17ac56.png


Thursday, December 10, 2015

Maple Sugaring at Home: Getting Ready to Tap My Tree

Maple Sugaring at Home
Pin It

I am thrilled because I have been given the opportunity to make my very own maple syrup this year ... and I get to share the experience with you!  Tap My Trees has graciously provided me with a maple sugaring starter kit and compensated me for my time and efforts.

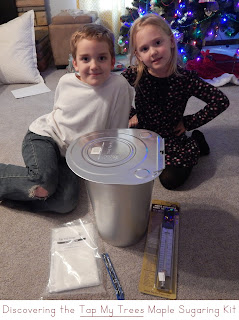
Exploring the Tap My Trees Starter Kit
First, a little back story...

I have lived in my current home for about three years. Before that I lived in a condo where there was no earth that I could call my own.  My husband and I didn't have too many requirements when we bought our new home except that we wanted four bedrooms and a little bit of land.  In my area, having any land is not the norm, so we were thrilled to find a street filled with 1 acre lots.

We have thoroughly enjoyed having some ground to call our own, but we have had a big learning curve!  When we first moved in, I couldn't tell a weed from a flower.  I'm learning a lot, but still have a long ways to go.  For instance, I know that we have a bunch of maple trees in our yard, but what kind of maples are they?  I had no clue.


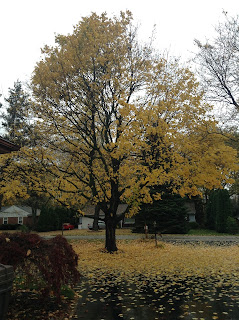
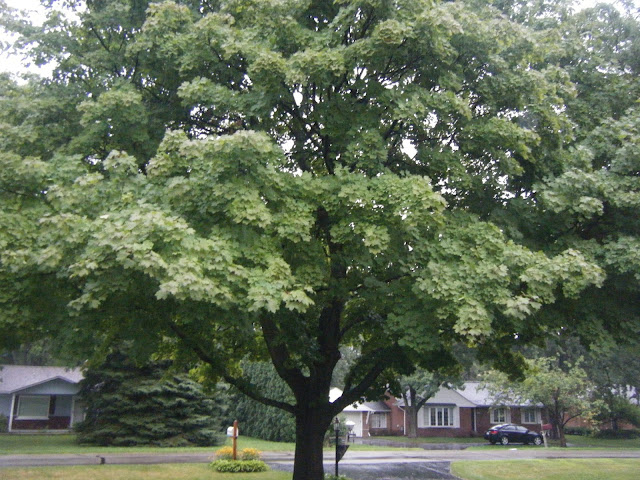
Unhealthy Silver Maple TreeHealthy Norway Maple Tree


Identifying Your Maple Trees


Sugar Maples are the best kind of maple trees to tap, but did you know that you can tap any maple tree?  The difference is that each type of tree has a different sugar content in its sap. The higher the sugar content, the less sap you will need to collect to make your syrup.  So a good place to start is to figure out what type of maple tree you have.

There are many types of maple trees, but here are a few that are common in my area (and hopefully yours).  For more detailed information Tap My Trees has some helpful identification pages, or else just search on Google and you will find all kinds of pages filled with pictures and charts to help you identify your trees!  Hopefully this will help you get started, though...

Sugar Maple LeafSugar Maple:


Leaf: 5 lobed, 3-5 inches wide, smooth margin

Bark: Dark brown with vertical grooves

Fall Color:  Bright yellow, orange, or red


Black Maple LeafBlack Maple:


Leaf: Usually 3 lobed, appears to be drooping, 4+ inches wide 

Bark: Dark brown with vertical grooves

Fall Color: Bright yellow, orange, or red


Red Maple Leaf

Red Maple:


Leaf: 3 lobed, 2-6 inches wide, serrated margin 

Bark: Dark with gray or black scaly plates

Fall Color: bright red


Silver Maple:


Leaf: 5-7 inches wide, silvery underside, fine teeth on margin  

Bark: Reddish brown, appears shaggy on mature trees

Fall Color: Mainly yellow


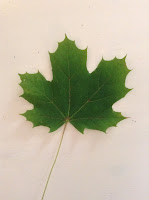
Norway Maple LeafNorway Maple:

  
Leaf:  5 lobes, 3-9 inches wide, tips end in a fine point, usually green but can also be a deep purple

Bark: brown, shallow grooves

Fall Color: usually yellow


What Kind of Maple Trees Do You Have?


Do any of these look familiar?  It turns out that I have a few Norway maples and a Silver maple.  Now I have to make a decision...What tree should I tap?  My Norway maples are very healthy and a perfect size for tapping, but they are not usually used because of their lower sugar content.  Silver maples have a decent sugar content, but mine is really big and not in the greatest condition.  Which would you choose?  Please leave a comment if you have any advice!

Healthy Norway Maple Tree
 One of my healthy Norway Maples


Unhealthy Silver Maple Tree
My sickly Silver Maple


Supplies Needed for Tapping Maple Trees


Making maple syrup is something that I have wanted to do for a long time, but I am completely clueless about the whole process (or at least I was!) so I never got the courage to give it a try.  I was thrilled to find out about Tap My Trees.  Making syrup is their business and they make it so easy for others who want to do it too!

Getting our maple sugaring supplies ready!

All you have to do is go to Tap My Trees and order a starter kit and you will have everything you need.  I received the Starter Kit for Teachers which also included a handy guide that walks you through the whole process step by step.  So now I have everything I need and I know exactly what to do.  THANK YOU, Tap My Trees!

(Did you know that you can find Tap My Trees on Amazon.com too?  Lots of options!  Can't go wrong either way.


Here is what the Starter Kit for Teachers includes:

Complete Starter Kit for Teachers from Tap My Trees

  • Maple Sugaring Lesson Plan: Lesson plan for the maple sugaring process. Can be adapted for third grade through high school.

  • Maple Sugaring at Home book: This guide provides step-by-step instructions (complete with pictures) to tap maple trees. Includes information on how to identify maple trees, how to tap trees, collection and storage of sap, uses for maple sap including how to make maple syrup, and frequently asked questions.

  • 1 Aluminum Bucket: 2 gallon aluminum bucket is used to collect the sap as it drips from the spile.

  • 1 Metal Lid: Lids prevent rain, snow, and foreign material from entering the bucket.

  • 1 Spile with Hook: Stainless steel spile (tap) is inserted into drilled hole to transfer sap into the bucket. Hook is used to hold the bucket.

  • 1 Drill Bit: 7/16 drill bit with 3/8 shank used to drill tap hole into your maple tree.

  • Cheesecloth: Used to filter any solids (such as pieces of bark) when transferring sap from the collection bucket to a storage container.

  • Filter: 24" X 30" filter sheet to filter sediment from finished syrup. Durapure grade filter.

  • 1 Bottle with Lid: Empty 12 oz. maple syrup bottle used to store finished syrup.

  • Thermometer: Candy thermometer for making maple syrup. Instrument Range: 100 to 400°F / 40 to 200°C. Stainless steel housing with mounting clip


That's a lot of stuff and most of it will service you well year after year!


Preparing to Tap Your Trees


What do you think?  Do you want to give this a try along with me?  Sugaring time is typically around February or March (depending on where you live and how the weather is behaving in that given year), so now is a great time to get your supplies.  A Maple Sugaring Kit would make an awesome Christmas gift to give (or ask for!) don't you think?  If all goes well this year, I'll be asking Santa for extra buckets so we can tap more of our trees!  If you have more trees to tap like I do, check out this starter kit that comes with three buckets, spiles, hooks. etc.

Tap My Trees Logo


So what do you need to do between now and February?


  • Identify the best trees in your yard (make sure it is at least 12 inches in diameter)

  • Take some time to learn about everything involved in the sugaring process.  Tap My Trees shares some great ideas for incorporating history, science, math, and more into your learning!

  • Help your child get excited by reading great books about making maple syrup:

8 Books About Making Maple Syrup


Learn more by connecting with Tap My Trees on:

Facebook --- Pinterest --- Twitter --- Instagram


Don't miss part 2 where we actually collected our sap and made maple syrup!


 photo SubscribeButton_zpsdc17ac56.png


Related Posts Plugin for WordPress, Blogger...